Working with Files and Folders
Opening Files
When opening a file, either via the main menu, via the file's context menu, by double-clicking on it or by hitting the enter key, the file manager performs the default action for that file type. For example, opening a text file will display it in the default text editor, while opening an image file will display the image in the default image viewer.
The default file open mode is double-clicking but you can set Thunar preferences so that a single click will execute the default action. For more information, see the section called File Manager Preferences.
Executing Non-Default Actions
To execute actions other than the default action for a file, select the file in question, then choose the desired action from the Open With choices available from the File menu or the right-click context menu.
Adding Actions
To add actions associated with a file type, perform the following steps:
- In the main area, select a file of the type to which you want to add an action.
- Choose File → Open With → Open With Other Application... from the main menu.
- Either choose an application from the list or select Use a custom command and browse to the program with which you wish to open this type.
The action you have chosen is now added to the list of Recommended Applications for that particular file type. If you enabled the Use as default for this kind of file option or there was no prior action associated with the type, the newly added action becomes the default.
You may also add actions using the Open With pick list under File → Properties....
Modifying Actions
To modify the actions associated with a file or file type, perform the following steps:
- In the main area, select a file of the type for which you want to modify the action.
- Choose File → Properties... from the main menu.
- Select the new default action by choosing one of the recommended applications in the Open With pick list or add a new action by choosing Other Application... and selecting an application in the Open With dialog.
Properties
| File and Folder Properties |
|---|
|
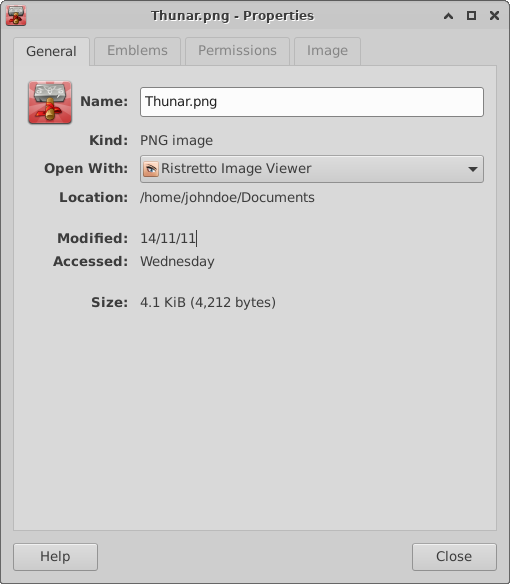
The Properties dialog shows more information about any file or folder in the file manager. To open the Properties window, perform the following steps:
- Select the file or folder you want to examine or change. You can select multiple items at once and display the properties that are common to them all.
- Do one of the following:
- Choose File → Properties... from the main menu.
- Right-click the item and choose Properties... from the context menu.
- Press Alt-Return.
If there are no files or folders selected, right-clicking anywhere on the whitespace or performing any of the other actions listed above will present the context menu of the current folder that you are viewing.
There are three or four tabs in the Properties dialog that give you access to the following information or actions:
General
- For folders:
- See the total size of all the files in the current folder and all subfolders.
- View a Usage slider which displays used and free space on the current partition.
- For files:
- The ability to change the default Open With action for this file and other files of the same type.
- File type and size.
Emblems
- Customize a particular file or folder's icon by adding an emblem.
Permissions
- Change the UNIX file permissions for a file or folder.
Image
- Only present for graphics files. View the image size in pixels (and other metadata, if available).
Selecting Files
There are several ways to select files in Thunar.
- To select a single file, you can simply click on it with the left mouse button.
- You can select multiple files by holding down the Ctrl key and clicking on the files, or holding down the Shift key to select a range of files.
- You can also select multiple files and folders by using the mouse to drag a selection box over them. Note: If you are using View as a Detailed List in the Main Area, you must first position the mouse over a file/folder name (not in the whitespace) before dragging.
- You can also select files by providing a pattern with the keyboard shortcut Ctrl-S or from the main menu Edit → Select pattern.... For example, to select all text files, hit Ctrl-S and enter “*.txt” in the dialog.
- If you want to find a single file and know the beginning of the filename, simply start entering the filename in the view. A text box will appear in the bottom right corner and an incremental search will be performed. The first file that matches what you type will be selected. If there are multiple files names beginning with the same letters, continuing to type the name you're looking for will narrow your search down until the file you want is selected.
Other options are Select all Files and Invert Selection, which can be found in the Edit menu.
The File Menu
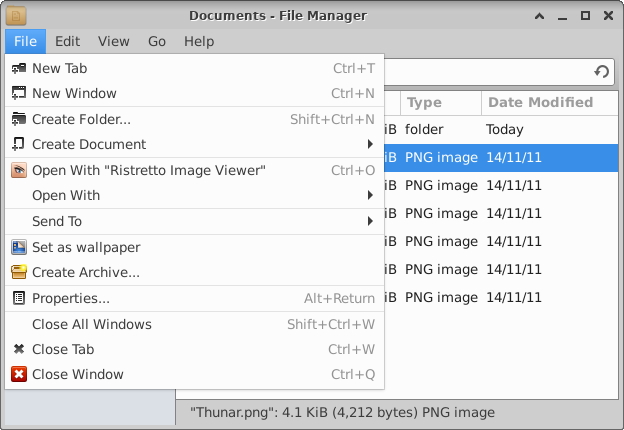
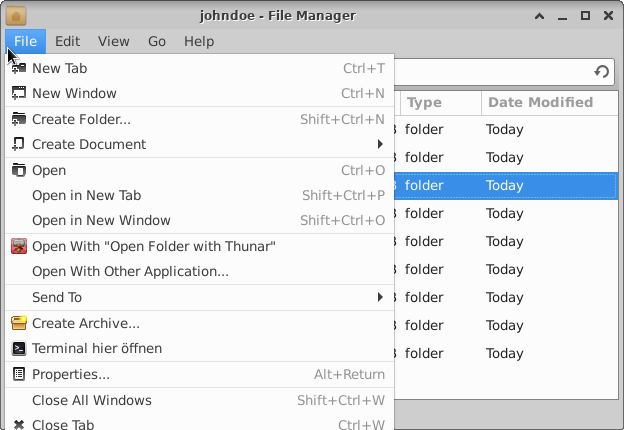
The File menu item is a context menu, meaning the entries you see on it will differ depending on whether the currently selected item is a folder or a file.
| File Context Menus |
|---|
|
Certain items on the File menu are not native Thunar functions but are provided by plugins. In the descriptions that follow, those items will be identified by Plugin. More detailed information on their usage can be found in the Plugins section of this documentation.
The following menu items are common to both folders and files:
- New Tab
- Opens a new tab within the file manager window and makes the new tab the current focus. The working directory in the new tab will be the same as the previous tab/window. You can open the new tab at a different folder by right-clicking on a folder and selecting Open in a New Tab from that menu.
- Create Document
- Allows you to create a new document either as a blank file or from a template. If you choose the Empty File option and type in a file name with no extension, by default it will create an empty, plain text document. If you assign a file extension of a recognized MIME type, it will create a file of that type. For example, typing
MyDocument.odtwill create a blank OpenDocument Text file. You can also create files from a pre-configured templates. To do that, you first create a file with all of your desired settings in the application of your choice and then save it in the~/Templatesfolder. That file name will then appear as a choice in the Create Document list. Give it a new name and you now have a new file based on your custom settings.
- Send To
- Plugin. Displays a menu with several targets where the selected folders or files can be sent.
- Create Archive
- Plugin. After selecting multiple files and/or folders, clicking this item will allow you to create a compressed archive file that contains all of the files in the selection.
The following menu items are specific to folders:
- Open in New Tab
- Creates a new tab at the top of the Main Area, labels the tab with the name of the opened folder and displays the folder contents in the Main Area.
- Open in New Window
- Opens a new instance of Thunar in a separate window and displays the contents of the selected folder.
- Find in this Folder
- Plugin. Launches the Catfish file finder application with the selected folder as the target.
The following menu items are specific to files:
- Open With "Application"
- See Opening Files in this section for descriptions of the various file opening options.
The Edit Menu
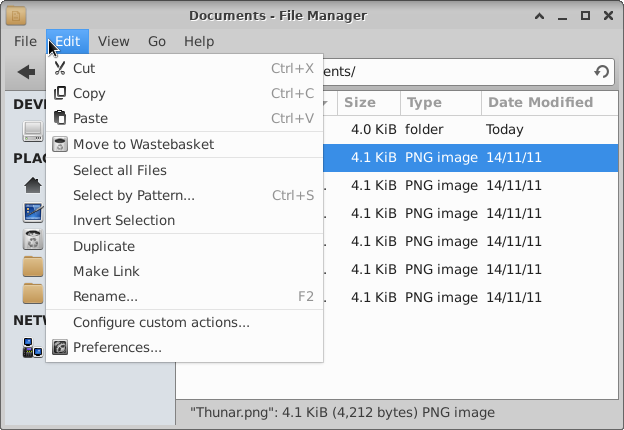
The Edit menu presents the same options for both folder and file selections.
| The Edit Menu |
|---|
|
- Cut, Copy, Paste
- These three options are probably the most often performed operations in Thunar. After making your file/folder selections, these actions can be accomplished from the Edit menu, by the indicated keyboard shortcuts or by dragging and dropping. You can copy or move files and folders between Thunar sessions in different windows or between tabs within the same window. While the difference between copy/paste and cut/paste should be obvious when using the menu or keyboard shortcuts, it is not so when dragging and dropping. The drag/drop operation performs a move when the source and target folders are on the same partition but it results in a copy when the source and target are on different partitions.
- Move to Trash
- This is the action that is performed by default when you select files and folders and press Delete. Files deleted this way are still able to be viewed and acted on by opening the Trash folder, including the option of restoring them to their original location if it turns out you were too hasty in deleting them. Right-clicking on the Trash folder and selecting Empty Trash permanently deletes all of the files stored there and frees up the disk space they were using.
- Delete
- Bypasses the Trash folder and permanently deletes the selected items once you agree by pressing Delete in the confirmation dialog.
- Select all Files, Select by Pattern..., Invert Selection
- See the Selecting Files paragraph above.
- Duplicate
- Creates a duplicate copy of the selected files or folders and appends
(copy 1)to the filename. Multiple selections are allowed.
- Make Link
- Creates a symbolic link (symlink) to the selected file or folder. See The UNIX File System for more information on symlinks.
- Rename
- Allows you to assign a new name to the file or folder. If multiple items are selected, invokes the Bulk Renamer Plugin.
- Configure custom actions...
- Plugin. Configure actions that will appear in the file manager's context menus for certain types of files.
- Preferences
- See the File Management Preferences section.
The View Menu
Most of the items on the View menu are either self-explanatory or have been discussed in the The File Manager Window section. There are just a couple that deserve further explanation below.
| View Menu |
|---|
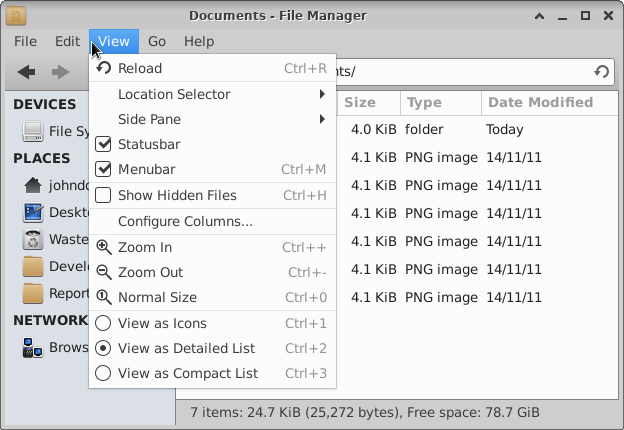 |
Show Hidden Files
Hidden files typically contain settings and configuration data which don't normally need to be accessed. For this reason and as a safety precaution to prevent their accidentally being moved, changed or deleted, they do not show up by default in the file manager. Check this option to make them visible. They can be identified by the dot prefix in the filename (e.g., .nvidia-settings).
Zoom
Increase or decrease the size of the icons and text in the Main Area. This is a “sticky” setting, meaning the new zoom level will be what you see the next time you start Thunar. If multiple windows are open, the other windows will not refresh with the new setting until they are closed and reopened. Select Normal Size to restore the default zoom level.
The Go Menu
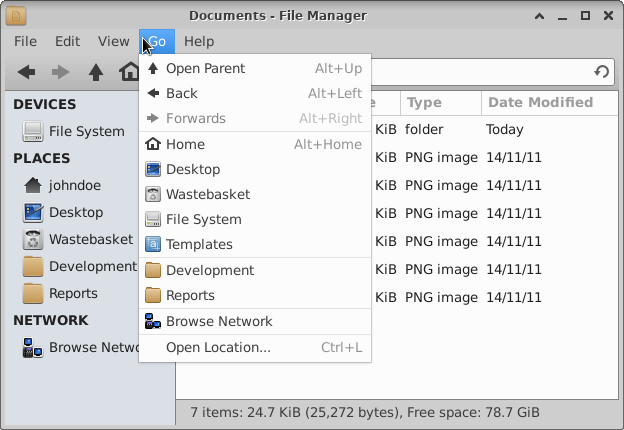
The Go menu provides options for navigating through the file system. Most of these options can be accessed more directly by clicking on the Side Pane or the Location Selector, or by using keyboard shortcuts. There are, however, a couple of exceptions to this rule. You will notice in the example below that there are some folders showing in the Go menu which aren't showing in the Side Pane. One of them is the special Templates folder (which isn't one of the default PLACES in the Side Pane). The other two, Development and Reports, are user-defined shortcuts which have been hidden using the Side Pane right-click menu. As you can see, the Go menu overrides that setting and displays all shortcuts.
| The Go Menu |
|---|
|