xfce4-settings - Appearance
The Appearance preference tool lets you configure various aspects of how your desktop looks.
Style
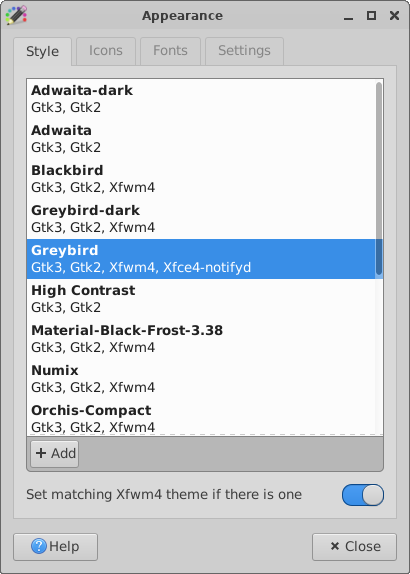
| Appearance Preferences: Style Tab |
|---|

|
This tab controls the visual appearance of the toolkit (Gtk+) controls, such as buttons and menus. You can switch between themes by selecting them in the list. The colored rectangles to the left of the style names give a preview of the color combinations found in each style for things like window backgrounds, fonts and menu item highlights.
To install new themes, download a package from your distribution or from theme sites like xfce-look.org. When you download a theme tarball from a website, you can install it by dragging the file from the file manager and dropping it in the list of styles.
Icons
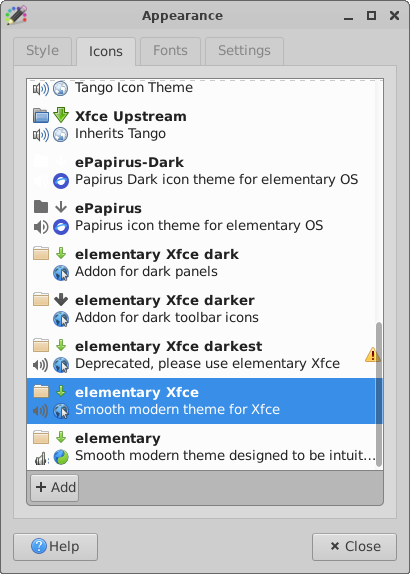
| Appearance Preferences: Icon Theme Tab |
|---|

|
This tab controls the visual appearance of icons which are shown in e.g. the panel, on the desktop, in the file manager and menus. Samples of several common icons are displayed next to the icon name so you can get a preview of how they will look and compare them to the same icons in other themes. You can choose a new icon theme by selecting it in the list.
As with Styles, you can install new icon themes simply by dropping an icon tarball onto the list. You can also install new themes using your distribution's package manager.
Icon Cache
GTK+ has a utility to pack all the icon theme icons into a single cache file. This single file can be memory-mapped so as to avoid a lot of disk seek overhead when loading icons. The file is shared between multiple applications, so the overall memory consumption is reduced as well.
For this to work, each icon theme directory containing an index.theme file, should also have an icon-theme.cache. Distributions will most likely generate this when installing a theme package, but for a custom theme, you'll have to create it yourself.
To generate a cache file for an icon-theme, run the following command in a terminal emulator:
gtk-update-icon-cache /path/to/theme/directory/
More information can be found in the gtk-update-icon-cache reference manual.
Fonts
Default Font
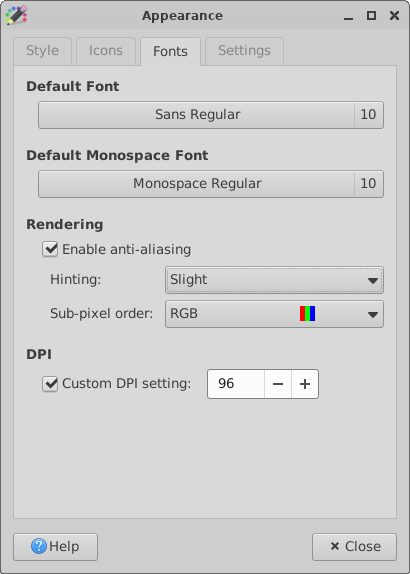
The font selector shows the name of the current default font and its point size. To change the font, click the font selector button. The font picker dialog opens. Select the font Family, Style, and Size from the lists. The preview area shows your current choice. Click OK to accept and apply the changes.
Rendering
- Enable anti-aliasing
- Select this option to anti-alias fonts, so that characters have smooth edges.
- Hinting
- Hinting is a font rendering technique which improves the quality of fonts at small sizes and an at low screen resolutions. Select one of the options to specify how to apply hinting your fonts.
- Sub-pixel order
- Select one of the options to specify the sub-pixel color order for your fonts. Use this option for LCD or flat-screen displays.
- LCD Hinting
- On some systems, LCD hinting results in better fonts. But because this is not working on all system, this setting is not configurable through the interface. You can, however, set it with a simple query:
-
xfconf-query -c xsettings -p /Xft/Lcdfilter -n -t string -s lcddefault - Other possible values are
lcdnone,lcddefault,lcdlightandlcdlegacy. You can check to see if the property is set properly by runningxrdb -queryin a terminal. To fully apply the LCD hinting, it is advisable to log out and in again (for restarting the X server).
DPI
In case you want to override the DPI (dots per inch) value calculated by the X-server, you can select the checkbox and use the spin box to specify the resolution to use when your screen renders fonts. Most of the time it is not necessary to modify the calculated DPI, but in some cases a high DPI results in sharper fonts.
Settings
Toolbar Style
Choose one of the four options to specify what to display on the toolbars in your GTK-compliant applications. The example below shows Text under icons.
| Appearance Preferences: Toolbar Style Settings Tab |
|---|

|
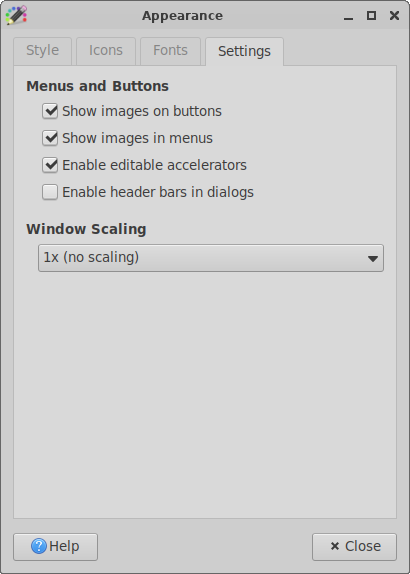
Menus and Buttons
- Show images on buttons
- Select this option to display an icon beside labels in the interface buttons. This option only applies to dialog buttons like Close, not for launcher buttons on the panel.
- Show images in menus
- Select this option to display an icon beside items in application menus and the panel menu. Not all menu items have an icon.
- Enable editable accelerators
- Selecting this option allows you to define new keyboard shortcuts for menu items in GTK applications.
- To change an application shortcut key, open the menu, and with the mouse pointer on the menu item you wish to change, press the new combination of keys. The new shortcut will appear next to the menu item text. To remove a shortcut key, press Backspace or Delete while hovering over the item.
There is no way to globally restore the default keyboard shortcuts for an application if you have accidentally reassigned them. However, if you discover your mistake and know where the shortcut originally belonged, you can just reassign using this same procedure to the default location.
- Enable header bars in dialogs
- Defines whether GTK dialogs may place widgets, such as buttons, in the dialog's header bar. Implies in client side decorations. Only affects newly opened dialogs.
Event Sounds
- Enable event sounds
- Event sounds include things like logging in/out, plugging/unplugging power, inserting/removing USB devices, etc. Requires “Canberra” support and may, in addition, require installing sound themes or other supporting applications, depending on your distribution.
- Enable input feedback sounds
- Enables playback of event sounds for things like button presses, window resizing, moving slider controls, etc.
Window Scaling
- You can switch between factor 1x (normal default) and 2x for HiDPI displays. It is advised to restart your session after altering this setting as not all applications may succeed in doing a live-reload.

